Precautions for Barrel Temperature Setting on TOSHIBA Injection Moulding Machines The barrel set temperatures vary with the resins as shown in the table below. The temperatures also vary with the resin makers and grades. Improper temperature setting may cause defective molding. Some resins may emit poisonous gas or are explosive. Before temperature setting, determine a proper temperature in consideration of the property or other factors of the resin. If the screw is to be rotated with no resin in the barrel so as to prevent screw or barrel breakage, rotate the screw at a speed of about 10 min-1 until melted resin comes out of the nozzle. Improper setting of barrel temperature may cause an accident breaking the screw and barrel in addition to operation cycle speed down due to the lowering of plasticizing capacity, deterioration or decomposition of resin due to local heat generation, or insufficient kneading. Especially in the case of molding PE or PP, the crystalline resin, plasticizing with barrel temperature set low and screw speed raised high may produce non-melted resin, generate great unusual pressure in
Read more →Barrel and Nozzle Temperature Setting on Injection Molding Machines [1] Cooling water running under hopper Check water flow with the flow checker on the non-operation side of the machine. If cooling water is not running, open the stop valve to run cooling water under the hopper. [2] Setting of barrel temperature (temperature, tolerance) Set barrel temperature matched to molding material to be used on the [TEMP] screen of INJECTVISOR. 1) Touch the [TEMP] screen selector button. 2) Touch [HN], [H1] – [H3] and [THROAT(option)] on the [TEMP] screen to successively open the setting window to set molding temperature of each control zone. (Number of barrel zones differs by machine model.) [3] Setting of barrel temperature tolerance (Alarm) Display the [BARREL] or [MON MGT2] screen to set temperature tolerance. 1) Touch the [TEMP] screen selector button. 2) Touch the [TOL] to successively open the setting window to set temperature tolerance of each control zone. 3) Touch [ALARM SELECT] buttons on [MON MGT2] screen to change alarm [ON/OFF]. [4] Press [BARREL] of the HEATER button on the operational controller to turn on
Read more →Ejection Force Setting on Toshiba Injection Molding Machines [1] Setting of ejection force Open the setting window on the [EJECT] screen to set the ejection force [PEJ]. 1) Touch [PEJ] (ejection force) on the [EJECT] screen to open the [PEJ EJECTION FORCE] setting window. 2) Set the required ejection force (kN ) in the step switch on the window. Generally set the maximum ejection force. 3) Touch [x] (close) to close the window.
Read more →Setting of Ejection Speed on Toshiba Injection Molding Machine [1] Setting of ejection speeds [VE1] and [VE2] Open respective setting windows to set ejection speeds [VE1, VE2] (mm/s) and ejection speed shift position [LS31A]. The case of ejector speeds-step shift control shown on the right is used to eject a product at low speed first and eject at high speed after releasing from the mold to prevent crack on the product. When repeated, speeds of the second and later ejection become VE2. [2] Setting of ejector retraction speed [VR] By following the same manner as above, open the setting window on the [CLAMP] screen to set ejector retraction speed. Speeds of the second and later ejection become the same as the first ejection. [3] Repeatedly press [ADVANCE] and [RETRACT] of EJECT buttons on the operation controller to check ejector operation.
Read more →Ejector Stroke Setting on Toshiba Injection Molding Machine [1] Temporary setting of ejection limit [LS31] Temporarily set the ejector stroke to the maximum on the [LS31] (ejection limit) window opened on the [CLAMP] screen of INJECTVISOR. [2] Press [ADVANCE] of the EJECT button on the operation controller in conjunction with ejector stroke of the mold to move the ejecting rods by the required amount. [3] Setting of ejection limit [LS31] 1) Read the ejection limit position [EJC POS] on the [CLAMP] screen. 2) Set the value read above again in the step switch on the [LS31 ADVANCE LIMIT] setting window. [4] Setting of ejector retraction limit [LS32] 1) By following the same manner as of [LS31], open the [LS32 RETRACT LIMIT] setting window to set the ejecting rod retraction limit. To move ejecting rods to the stroke end of the ejector, set [ 0 ] mm. 2) Continuously press [RETRACT] of the EJECT button on the operation controller. Check that ejecting rods have returned to the retract limit. (The LED on the upper left lights.) Feel Free to Contact Us
Read more →Setting of Ejection Mode and Count on Injection Molding Machine [1] Press [MAN] of the OPERATION selector button on the operation controller and close the safety gate. [2] Mold opening Continuously press [OPEN] of the MOLD button to open the mold to the open limit. [3] Setting of ejection mode and count (A) With ejector [A] circuit used This mode starts ejection with the mold located at the open limit. Display the [CLAMP] screen on INJECTVISOR, for setting. 1) Press the [CLAMP] screen selector button and the [CLAMP] screen change button to display the [CLAMP] screen. 2) Touch [A] of the [EJECT MODE] switch to select ejection mode [A]. 3) Touch [EJC COUNTS] on the [CLAMP] screen to open the [EJC COUNTS] setting window. * When [HOLD] of [EJC COUNTS] is selected, ejectors return automatically on completion of [MID] time. 4) Set the necessary ejection count on the setting window. 5) Touch [x] (close) to close the window. (B) With ejector [B] circuit used This mode starts ejection at the preset “LS30” position during retraction of the movable mold. Display
Read more →Adjustment and Setting of Clamp Controller on Toshiba Injection Molding Machine 1. Setting of Clamping Force and Low Clamping Force [1] Press [SERVO] of the PREPARATION button on the operation controller to turn on the servomotor. [2] Press [SET-UP] of the OPERATION selector button on the operation controller. [3] Setting of low-pressure clamp force PCL 1) Change the INJECTVISOR screen to [CLAMP]. 2) Press the [CLAMP] screen selector button and the [CLAMP] screen change button to display the [CLAMP] screen. 3) Touch [PCL] (low-pressure clamp force) on the screen to open the [PCL LOW PRESSURE CLAMPING] setting window. 4) Set the lowest clamping pressure (PCL) to enable mold opening/closing and mold closing smoothly while actually opening and closing the mold platen. [4] Setting of clamp force After setting of low-pressure clamp force, set clamp force on the same screen. 1) Touch [PCH] (clamp force) on the [CLAMP] screen to open the [PCH CLAMPING PRESSURE] setting window. 2) Set the required clamp force (kN ) on the step switch of the setting window. It is recommended to set clamp force lower
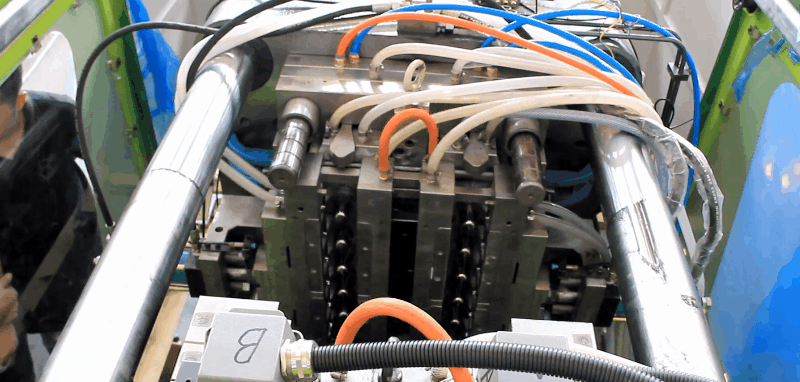
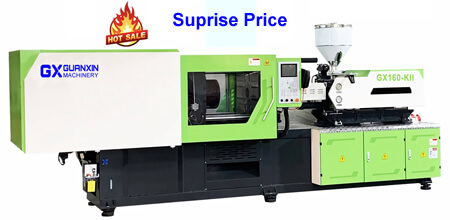
Read more →What Are Injection Molding Machine Specifications Injection Molding Machine`s Specifications mostly includes four units: Clamping Unit, Injection Unit, Hydraulic Unit, and Electric Unit. And there are many main index parameters in each unit. All brands of injection molding machines should list this index parameter for buyers’ information to select the right machine. No matter it is Husky, Toshiba, Nissei, Engel, JSW, Toyo, Haitian, Sumitomo, Mitsubishi, Arburg, Battenfeld, LG, CLF, Windsor or Demag injection molding machine. While selecting an injection molding machine, you must understand and value of the specifications of plastic Injection Molding Machine: Feel Free to Contact Us if Any Questions
Read more →Detect Circuit of Ejector Plate Retract on Injection Molding Machine This device is the interlock circuit for the injection molding machine by means of detecting the retract limit of ejector plate inside the mold. [1] Plug and Receptacle Before using this circuit, complete wiring of the limit switch for the Ejector retract limit. The receptacle box is located on the operation side of the movable platen. [2] Interlock The mold does not close unless both limit switches for ejector retract limit (LS32) and mold ejector retract limit are turned on. If the detection circuit is not used, install the short plug attached for the machine.
Read more →How to Clean the Control Cabinet in Injection Molding Machines There is a possibility of igniting and spreading because of the tracking phenomenon* when dust or refuse is collected in the control cabinet. Moreover, there is a possibility that the performance of the injection moulding machine cannot be demonstrated enough or the breakdown of internal electric apparatuses is caused since contact failure on electric parts is caused because of dust or refuse collected. Therefore, clean the inside of the control cabinet regularly. * Tracking phenomenon: It is likely that electric leak occurs when the dust collected in the space between apparatuses becomes damp. The leak part causes creeping discharge and carbonized as time passes and then the carbonized part ignites. By TOSHIBA MACHINE CO.,LTD.
Read more →How to Clean the Air Filter in Injection Molding Machines Air filters are installed to prevent the invasion of dust into the control cabinet or control station. Internal filters, if clogged because of fouling, interrupt sufficient air supply or exhaust from the control cabinet or control station. This prevents the plastic molding machine from exhibiting full performance or results in failure of internal electric apparatuses as a result of internal temperature rise. Hence clean filters periodically. Clean air filters by following the procedure below. 1) Detach the lids of air filters on the control cabinet and control station. (The photo shows the example of the control cabinet.) Fit a screwdriver into the detaching hole provided on the side face of the air filter to detach the lid. 2) Take out the filter placed inside. 3) Clean the filter by water washing or vacuuming. Dry sufficiently after water washing. Replace the filter if fouled excessively. 4) Fit the filter on the control cabinet or control station after cleaning. By TOSHIBA MACHINE CO.,LTD. Feel Free to Contact Us if Any Questions
Read more →How to Inspect the Load Cell in Injection Molding Machines A precise load cell has been installed to carry out pressure control of closed-loop. The load cell may lose its correct zero point being affected by load or temperature. After turning on the power of the injection machine, check the zero point of load cell by following the procedure below. A) Checking the load cell 1) Press [SERVO] of the PREPARATION button to turn off the servomotor. 2) Touch the INJECT screen selector button and the [INJECT] screen change button to display the [INJECT] screen. Then read the value of [INJ PRESS] on the screen. The normal range of pressure is within 1 MPa [145 psi]. B) Checking the zero point of load cell When the displayed value of injection pressure deviates from 1 MPa [145 psi] of range, check the zero point of load cell by following the procedure below. 1) Dismount the shaft Stop cover to remove the split collar connecting the screw and shaft S. (Refer to section 5.1.2 Replacing the Screw.) 2) Press [SERVO] of the
Read more →