| Poor transparency of PET bottles |
1. The heating temperature is too high
2. The heating time is too long
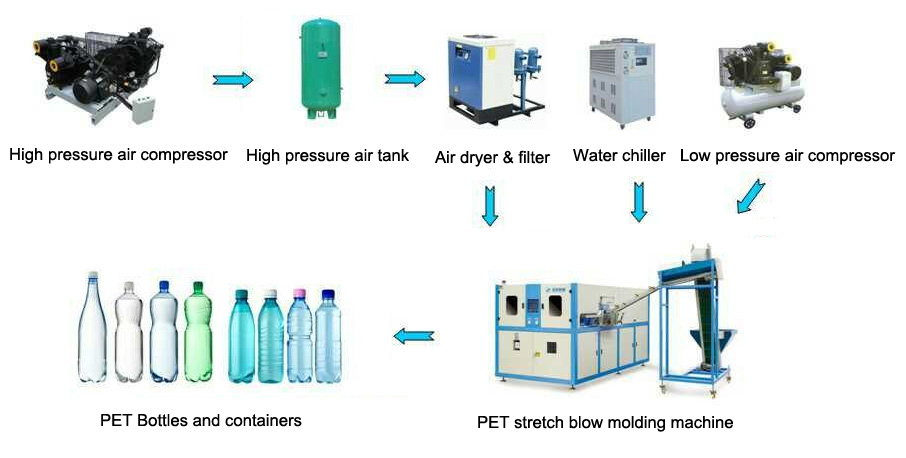
3. Compressed air contains moisture
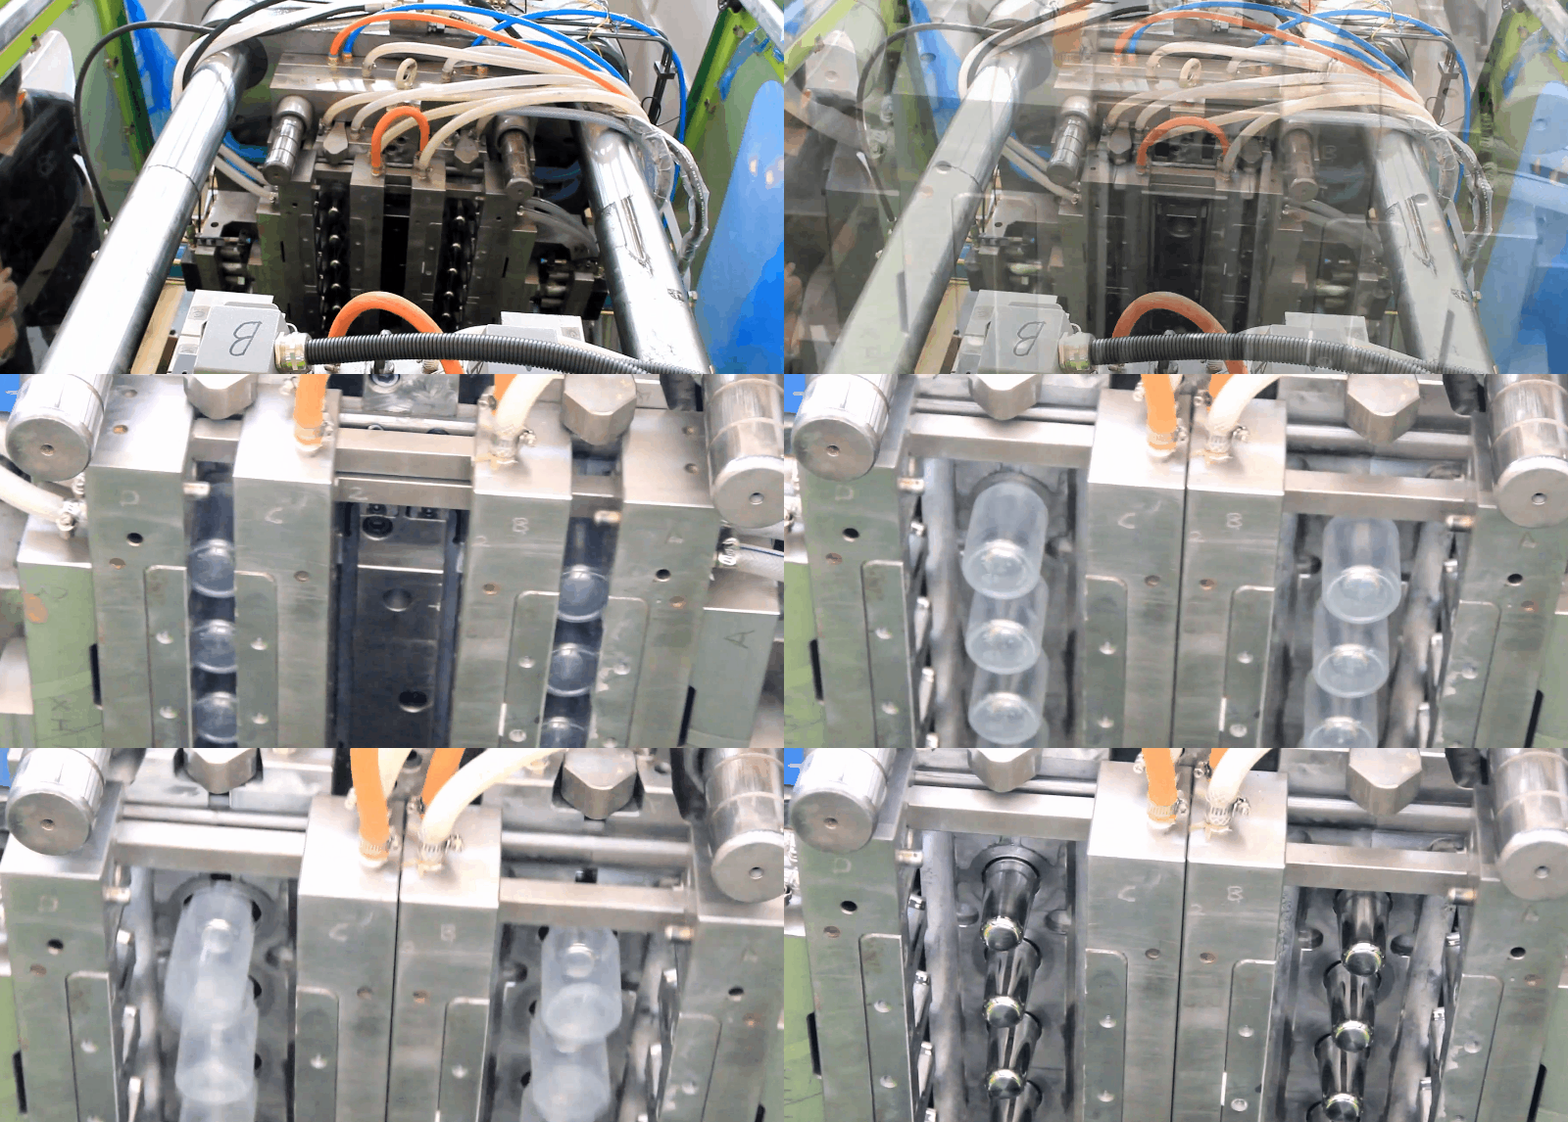
4. The injection embryo tube itself is opaque
5. Unsuitable embryo tube design
6. The proportion of inflation is too small
|
1. Cool down
2. Shorten the heating time
3. Use a dryer to remove water
4. Improve the quality of embryo tube, choose materials and improve the dryness of raw materials
5. Improve the design of embryo tube size
6. Reduce the diameter of the embryo tube.
|
| The pearl gloss appears in the PET bottle |
1. The heating temperature is too low
2. Uneven wall thickness
3. The thickness of the embryo tube is too thick, and the penetration of heating is insufficient
|
1. Warm up or slow down the revolution speed
2. Improve embryonic tube quality
3. Reduce the thickness of the embryonic tube, or try to raise the outer cover of the heating device to increase the temperature of the surface of the embryonic tube.
|
|
The position of the bottom of the PET bottle is offset
|
1. Start blowing too early
2. The stretching rod does not go down to the end
3. The stretching rod is offset from the center line of the bottle axis
4. Uneven wall thickness or uneven injection density
5. Uneven heating
|
1. Delay the blowing time or increase the descending speed of the stretch rod
2. Adjust the position of the magnetic pole switch
3. Adjust the position of the stretch rod
4. Improve the quality of embryonic tube
5. Improve the heating conditions, or check whether there is any problem with the rotation of the embryo tube.
|
|
|
Poor transparency of PET bottles
|
1. The heating temperature is too high
2. The heating time is too long
3. The compressed air contains moisture
4. The injection embryo tube itself is opaque
5. The embryo tube design is unsuitable
6. The inflation ratio is too small.
3. Use a dryer to remove water
4. Improve the quality of the embryo tube, select materials and increase the dryness of the raw material
5. Improve the design of the embryo tube size
6. Reduce the diameter of the embryo tube
|
|
The pearl gloss appears in the PET bottle
|
1. The heating temperature is too low
2. Uneven wall thickness
3. The thickness of the embryo tube is too thick, and the penetration of heating is insufficient
|
1. Warm up or slow down the revolution speed
2. Improve embryonic tube quality
3. Reduce the thickness of the embryo tube, or try to raise the outer cover of the heating device to increase the temperature of the surface layer of the embryo tube
|
|
The position of the bottom of the PET bottle is offset
|
1. The blowing time is too early
2. The stretching rod is not lowered to the bottom
3. The stretching rod is offset from the centerline of the bottle shaft
4. The thickness of the embryo tube wall is uneven or the injection density is uneven
5. Uneven heating
|
1. Delay the blowing time or increase the descending speed of the stretch rod
2. Adjust the position of the magnetic pole switch
3. adjust the position of the stretch rod
4. improve the quality of the embryo tube
5. improve the heating conditions, or check the embryo tube for rotation
|
|
Uneven wall thickness of PET bottles
|
1. The position of the stretch rod is not in the center of the embryo tube
2. The air blowing holes are asymmetrical and have different apertures
3. The stretch ratio is too low or the inflation ratio is too small
4. The embryo tube does not rotate in the heating furnace
5. Uneven wall thickness or uneven injection density
|
1. Adjust the position of the stretch rod
2. Adjust the position and aperture of the blow hole
3. Increase the stretching ratio or inflation ratio
4. Check the rotation device
5. Improve embryonic tube quality
|
|
The upper part of the bottle is too thick
|
1. The upper temperature is too low
2. The position of the die vent is too far from the upper part
3. The stretch ratio is too low
4. The inflation ratio of the upper part of the bottle is too low
5. The stretching rod speed is too slow
|
1. Upper heating
2. Adjust the position of the exhaust hole
3. Increase the stretching ratio
4. Change the bottle shape
5. Adjust the stretching rod speed
|
|
The bottom of the bottle is too thin
|
1. It is too early to start blowing
2. The temperature at the bottom is too high
3. The bottom of the embryo tube is too thin
|
1. Delay the start of blowing time
2. Lower the bottom temperature
3. Increase the thickness of the embryonic tube bottom
|
|
Bottle clamping line is obvious
|
1. The mold clamping pressure is not enough
2. The sealing time is too early
3. Mold problems
4. The size of the mouth of the embryo tube does not match the mold
|
1. Increase the clamping pressure and adjust the angle of the clamping stay (<5 degrees).
2. Position of the post-movement clamping switch.
3. Repair the mold or check the mold assembly position, such as whether the guide post is loose or the mold is not compressed.
4. The maintenance position of the mold mouth.
|
|
Bottle bottom or bottleneck rolled up and accumulated material
|
1. Delayed blowing time is too long.
2. One roll, one good.
3. The temperature at the accumulation place is too low.
4. The air pressure for movement is unstable, which affects the descending speed of the stretching rod.
|
1. Shorten the delayed blowing time or reduce the descending speed of the stretch rod.
2. Decrease the volume of air on the side of the roll bottle.
3. Increase the heating temperature of the embryo tube.
4. Add a gas storage tank to the action gas source, or shorten the gas supply pipeline.
|
|
Stretching the bottom of the bottle
|
1. The temperature is not enough, not penetrated
2. Delayed stretching time is too long
3. The draw ratio is too large
4. The bottom of the embryo tube is too thin
5. Stretching head is too sharp
|
1. Heating
2. Shorten the delay stretching time
3. Reduce the draw ratio
4. Improve the bottom design of the embryo tube
5. Round head
|
|
Blasting at the bottom of the bottle
|
1. Delayed blowing time is too short
2. Delayed mold opening time is too short
3. Temperature is too high
4. Exhaust valve does not work.
|
1. Increase the delayed blowing time or increase the draw bar falling speed
2. Increase the delay of mold opening time
3. Cool down
4. Clean the exhaust valve with gasoline
|
|
The bottom of the bottle is not full
|
1. The temperature of the bottom of the bottle is too high
2. The exhaust holes at the bottom of the mold are insufficient or uneven
3. The stretching rod does not reach the bottom
4. The design of the stretching rod head does not conform to the shape of the bottom of the embryo tube
5. The blowing pressure is insufficient
1. Insufficient flow rate of the blow valve
7. Poor design of the bottom curve of the bottle
|
1. Reduce the temperature at the bottom of the heating zone or use a damp cloth to reduce the temperature at the bottom of the embryo tube
2. Increase the number of exhaust holes and make them evenly distributed
3. Adjust the stretching rod Go to the bottom of the bottle
4, replace the stretching rod head
5, increase the blowing pressure
6, clean the blowing valve with gasoline
7, increase the streamline design of the bottom of the bottle
|
| |
1. If the tooth is in a specific position relative to the embryonic tube, it is the cause of uneven thickness of the embryonic tube
2. If the mold clamping line is in a certain position relative to the mold, it is a mold exhaust problem
3. Uneven heating of the embryo tube
4. Poor design of the bottom of the mold
|
1. Improve the design of embryonic tube thickness
2. Improve the vent at the bottom of the mold
3. Improve heating conditions
4. Improve the bottom design
|
|
No power indication for bottle blowing machine
|
1. No power at the socket
2. Broken insurance
3. The thread ends off
4. The safety emergency switch is not turned on
5. Whether the power switch is turned on and placed on
6. The indicator is damaged
7. Whether the small circuit breaker of the control socket in the heating furnace is closed
|
1. Check whether there is electricity in the socket and whether the leakage switch trips
2. Check whether the line is short-circuited, and then replace the fuse
3. Connect the connector
4. Open the emergency safety switch
5. The power switch is turned on
6. Replace the indicator
7. Close the circuit breaker
|
| No sealing and stretching action |
1. The mold clamping stroke is not in place
2. The clamping stroke switch is broken
3. The wires fall off
4. The delayed stretch time relay is damaged
5. Damage of lifting solenoid valve and stretching solenoid valve
6. Cylinder inlet and exhaust throttle valves are blocked or closed
7. Corresponding solenoid valve failure
8. Delayed stretching time is set to “0”
|
1. Move the clamping block forward
2. Replace the clamping stroke switch
3. Connect the thread
4. Replace the time relay
5. Replace the solenoid valve
6. Check the hole position to ensure smooth flow
7. Check the related solenoid valve
8. The delay stretch time setting should not be less than “0” |
| The disc does not rotate |
1. The fuse is broken and the disc does not turn
2. The AC contactor and thermal relay are damaged
3. The motor lacks phase (buzzing)
|
1. Use a multimeter to block (R × 1) to measure the fuse resistance. If it is 0, it means good; if it is ∞, it means that it is broken.
2. Use a multimeter ACV250 to measure the voltage across the AC contact coil. If it is 0, then measure the voltage between the upper end of the AC contactor coil and the thermal relay (96).
If it is 220V, the thermal relay is damaged or overloaded
3. Connect the phase line
|
| Alarm sound |
The main motor current is too large, the thermal relay overload current protection is cut off. |
Check the motor fault or adjust the thermal relay overload current |
| Air switch adjustment |
1. Short circuit of live wire and voltage regulating circuit
2. The motor burns out
|
1. If the switch is closed, it will trip, first turn off the heating air switch, then close, if it jumps again, it means that the main line has a short circuit to ground,
Close the air switches one by one. When it closes a certain time, it means that there is a problem with a voltage regulating circuit of this air switch. Check them one by one.
2. If the motor trips after starting, it means there is a problem with the motor branch
|
| The lamp is off |
1. The voltage regulator circuit is damaged
2. The lamp filament is broken
3. The SCR is damaged or disconnected
4. The lamp is broken
|
1. Use a multimeter ACV250 to measure the voltage across the lamp tube
2. If there is 220V, the filament of the lamp tube is broken, removed, and rechecked with a multimeter R × 1 file
3. If it is “0”, check the corresponding voltage regulator circuit, first measure whether there is voltage output, then measure whether there is voltage input,
If there is input but no output, the SCR is generally damaged or the potentiometer is unsoldered
4. When adjusting the potentiometer, the indicator light has a light and dark change, which can indicate that the thyristor is intact and it is determined that the lamp is broken.
|
|
The stretch bar fails to rise back to its original position after mold opening
|
1. The position of the magnetic pole switch is too low, and the piston of the cylinder does not pass the magnetic pole switch after the stretching rod reaches the bottom of the stretching position
2. The stretching speed of the stretching rod is too fast.
|
1. Manually raise the stretching rod to the original position, and then adjust the magnetic pole switch to a higher position to ensure that the magnetic pole switch can sense the piston when the stretching rod is stretched to the bottom
2. Tighten the screw of the one-way throttle valve joint under the stretching cylinder clockwise to reduce the speed at which the stretching rod descends.
Note that changing the speed of the stretching rod may affect the effect of blowing the bottle. You can adjust the time setting of “Delayed Blowing” appropriately to make a match.
The ideal effect of starting blowing when the stretching rod reaches the bottom of the bottle is achieved.
|
| Haze |
1. IV too low,
2. Preform too hot,
3. Low level crystallinity in preform |
|
| Pearlescence |
1. Preform too cold,
2. Insufficient soak time,
3. Improper preform design |
|
| Pearlescence in a Particular Section |
Affected section too cool |
|
| Thin Sidewalls |
1. Preform too hot,
2. IV too low,
3. excessive preform moisture,
4. improper heating profile |
1. Decrease the PET Preform Heating Temperature
2.
3. Increase the preform heating temperature or material heating time for half an hour
4. Double check the infrared heaters` working situation
|
| Heavy neck area |
1. Preform too hot,
2. IV too low,
3. excessive preform moisture,
4. improper heating profile,
5. too much heat in bottom area,
6. pre-blow air starting too early |
1. Decrease the PET Preform Heating Temperature
2.
3. Increase the preform heating temperature or material heating time for half an hour
4. Double check the infrared heaters` working situation
5. Decrease the top infrared heater`s temperature
6. Stare pre-blow a bit earlier
|
| Shelf life failure |
1. Preform too hot,
2. IV too low,
3. Excessive preform moisture
4. Improper heating profile |
1. Decrease the PET Preform Heating Temperature
2.
3. Increase the preform heating temperature or material heating time for half an hour
4. Double check the infrared heaters` working situation
|
| Heavy bottom area |
1. Preform too hot,
2. IV too low,
3. Excessive preform moisture,
4. Improper heating profile,
5. Too much heat in top area,
6. Pre-blow air starting too late |
1. Decrease the PET Preform Heating Temperature
2.
3. Increase the preform heating temperature or material heating time for half an hour
4. Double check the infrared heaters` working situation
5. Decrease the top infrared heater`s temperature
6. Stare pre-blow a bit earlier
|
| Drop Test Failure |
1. Preform too hot,
2. IV too low,
3. Excessive preform moisture,
4. Improper heating profile,
5. Too much heat in top area,
6. Preblow air starting too late,
7. Excessive gate crystallinity in preform |
1. Decrease the PET Preform Heating Temperature
2.
3. Increase the preform heating temperature or material heating time for half an hour
4. Double check the infrared heaters` working situation
5. Decrease the top infrared heater`s temperature
6. Stare pre-blow a bit earlier
7. Decrease the preform neck crystallinity
|
| Top Load Failure |
1. Preform too hot,
2. IV too low,
3. Excessive preform moisture,
4. Improper heating profile,
5. Too much heat in top area,
6. Preblow air starting too late |
1. Decrease the PET Preform Heating Temperature
2.
3. Increase the preform heating temperature or material heating time for half an hour
4. Double check the infrared heaters` working situation
5. Decrease the top infrared heater`s temperature
6. Stare pre-blow a bit earlier
|
| Creep |
1. Preform too hot,
2. IV too low,
3. Excessive preform moisture |
1. Decrease the PET Preform Heating Temperature
2.
3. Increase the preform heating temperature or material heating time for half an hour
|
| Localized Surface Imperfections |
1. Water in blow air
2. Contamination
3. Small un-melts in preforms |
1. Check and improve the air drying system or replace the drying filter
2. Check the preforms` surface whether it`s clean or not
3. Double check the preforms quality and improve it
|
