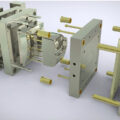
Mold Mounting and Die Height Adjustment on Injection Molding Machines
[1] Press [SET-UP] of the OPERATION selector button on the operation controller.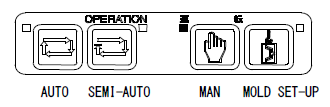 [2] Mold opening
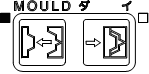
Continuously press [OPEN] of the MOLD button on the operation controller to open the movable platen to the open limit.
NOTE:
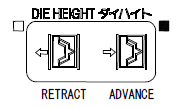
If mold entry is difficult even after the movable platen opened to the open limit, press [OPEN] of the DIE HEIGHT button to open the mold platen to the position to allow mold entry.
When the mold has not been changed for a long time, press [OPEN] and [CLOSE] of the DIE HEIGHT button to open and close the platen one time. At this time move the platen for the full stroke of DIE HEIGHT.
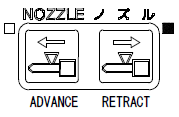
Press [RETRACT] of the NOZZLE button on the operation controller to move the nozzle to the retract limit.
 [4] Press [SERVO] of the PREPARATION button on the operation controller to turn off the servomotor.
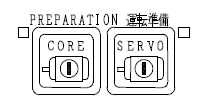
Securely turn [OFF] of the power of the machine before entering between the molds for working.
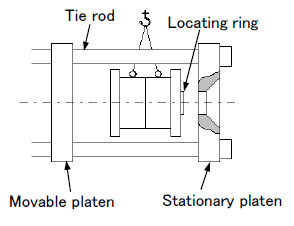
Lift the mold with both movable and stationary mold halves coupled and insert the mold locating ring into the locating ring hole of the stationary platen for positioning.
* For Min. mold height / Max. mold height / Min. mold size, refer to the instruction manual “APPENDIX”.
[6] Press [SERVO] of the PREPARATION button on the operation controller to turn on the servomotor.
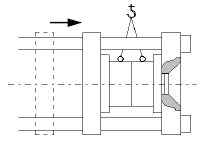
[7] Mold closingCheck that the safety gate is closed. Continuously press [CLOSE] of the MOLD button on the operation controller to close the movable platen to touch the mold.
NOTE: Check that [SET-UP] of the MOLD button has been pressed.
Follow the procedure below if the movable platen cannot touch the mold even after closing to the close limit.
1) Check that the safety gate is closed.
2) Check that [SET-UP] of the MOLD button has been pressed.
3) Press [OPEN] of the MOLD button on the operation controller to open the mold platen to the position of
4) Continuously press [ADVANCE] of the DIE HEIGHT button on the operation controller to close the mold platen to the position 1~9 mm [0.04 ~ 0.35 in] before full closing. (LED lights.)
5) Continuously press [CLOSE] of the MOLD button on the operation controller to close the mold platen to the end.
1) Check that the safety gate is closed.
2) Check that [SET-UP] button has been pressed.
3) Press the [MT. SET] button on the operation controller. (THE LED flickers.)
4) Press the [MT. SET] button twice to adjust mold thickness. Die height adjustment is automatically carried out.
When completed, flickering LED goes off. Avoid operating the machine until die height adjustment is completed. Motor drive sound disappears when die height adjustment is completed.
a) Die height adjustment functions only with [SET-UP] of the OPERATION selector button pressed.
b) To stop die height adjustment on the way, press the [M.T. SET] button once again. The flickering LED goes off to stop die height adjustment.
c) Follow the procedure from 1) above to try die height adjustment again or in the case when the EMERGENCY STOP button is pressed or power is turned off during die height adjustment.
d) Be sure to carry out die height adjustment when clamp pressure setting is changed.
e) After mold temperature becomes stabilized, carry out die height adjustment once again.
f) Be sure to carry out die height adjustment when the mold is changed even with the mold of same size (including repaired mold).
g) Occasionally carry out die height adjustment when operating the machine by using the same mold for a long time.
1) Confirm the platen position on the [CLAMP] screen after die height adjustment.
2) Set the following value in the [LS2] (mold close limit) on the [CLAMP] screen.
3) Press [MAN] of the OPERATION selector button on the operation controller.
4) Continuously press [CLOSE] of the MOLD button on the operation controller to clamp the mold (lock-up). On completion of lock-up, [CLAMP] on the CLAMP screen lights.
[11] Open the safety gate.[12] Mold fixing
Fix the stationary mold to the stationary platen and movable mold to the movable platen with bolts.
There are various methods to fix molds, such as direct fixing with bolts, using clamps, using T-slot bolts and nuts, using an automatic clamping device, and using a magnetic clamping device.
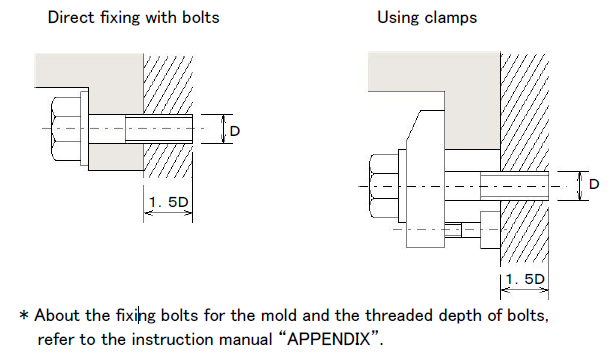
Give sufficient consideration to the maximum mold opening force and nozzle touch force, and maintain proper bolt size, number of bolts and threaded depth. Fixing bolts should have threaded depth 1.5 times the bolt diameter as shown in the table below. Tighten fixing bolts occasionally not to allow loosening in operation. [13] Remove the wire lifting the mold.
1) Securely turn [OFF] the power of the machine before entering between the molds to mount the mold.
2) Keep the mold lifted by using a crane until the completion of mold set-up to securely prevent mold dropping.
1) Close the safety gate.
2) Press [SERVO] of the PREPARATION button on the operation controller to turn on the servomotor.
3) Check that [SET-UP] of the OPERATION selector button on the operation controller has been pressed.
4) Press [OPEN] of the MOLD button on the operation controller to release mold clamping (lock-up).
[15] Press [SERVO] of the PREPARATION button on the operation controller to turn off the servomotor.